
Side Dishes
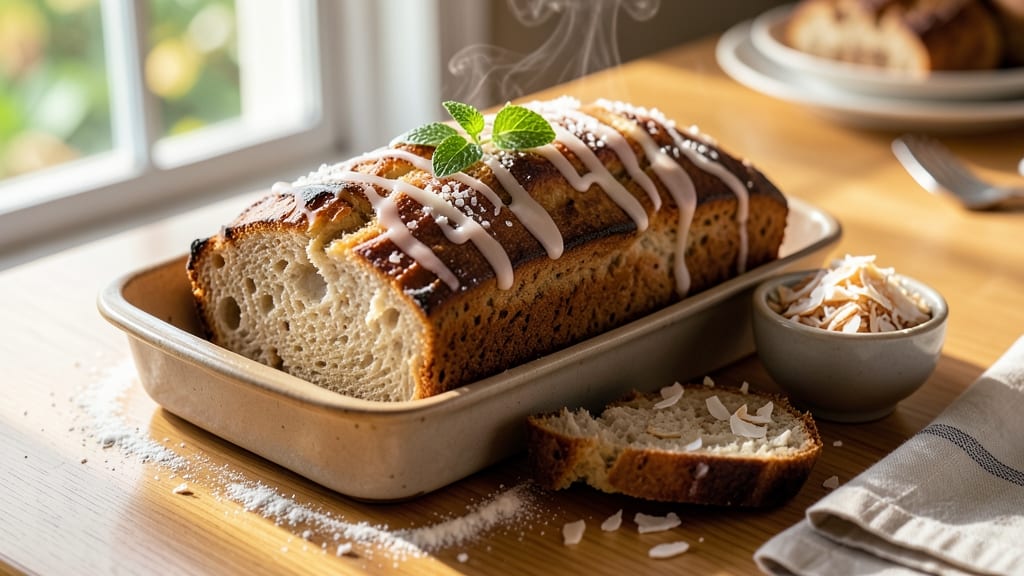
This Aloha bread recipe brings the warm, buttery aroma of Hawaii straight to your kitchen with its signature tropical swirls and golden crust. 🌺 The secret lies in a simple dough enriched with coconut milk and folded with sweetened pineapple or macadamia nut filling—just like the breads you'd find at local bakeries on Oahu.
What makes it special is how effortlessly it combines classic bread-making with vibrant Hawaiian flavors, creating a treat that's both nostalgic and fresh.
The dough comes together in under 15 minutes of mixing, then rests while you shape it into a round loaf with the filling tucked inside. Baking at 350°F for 25-30 minutes yields a tender crumb with a crispy, caramelized crust that's impossible to resist.
The filling stays gooey and fragrant, making every slice a little taste of paradise. Perfect for breakfast toast, dessert, or as a side to complement savory dishes, this bread is as versatile as it is delicious.
What sets Aloha bread apart is its ability to transport you to Hawaii with every bite—whether you're using traditional pineapple filling or experimenting with macadamia nuts and coconut. The dough's slight sweetness pairs beautifully with the tropical flavors, creating a harmony that's both comforting and exciting.
This recipe delivers restaurant-quality results with minimal effort, making it ideal for both beginners and experienced bakers.
Serve warm with a pat of butter or drizzle with honey for an extra touch of sweetness. The bread keeps well at room temperature for a few days, so you can enjoy it all week.
Whether you're celebrating Hawaiian culture or simply craving a taste of the islands, this recipe is your ticket to homemade Aloha bread that rivals the best from local bakeries.
Ingredients for aloha bread
Tropical flavors meet buttery crust in this Aloha bread—just 13 ingredients for island-inspired magic.
| Ingredient | Amount | Notes |
|---|---|---|
| All-Purpose Flour 🌾 | 4 cups | Sifted for light texture |
| Granulated Sugar 🍚 | ¼ cup | White or light brown |
| Active Dry Yeast 🍞 | 2 ¼ tsp | 1 packet or 7g |
| Salt 🧂 | 1 tsp | Kosher or sea salt |
| Unsalted Butter 🧈 | ½ cup | Room temperature, full-fat |
| Coconut Milk 🥥 | ½ cup | Full-fat canned, chilled |
| Large Eggs 🥚 | 1 whole | Room temperature |
| Sweetened Pineapple Filling 🍍 | 1 ½ cups | Store-bought or homemade |
| Macadamia Nuts 🌰 | ½ cup | Chopped, optional variation |
| Coconut Flakes 🥥 | ¼ cup | Toasted, for garnish |
| Honey 🍯 | 2 tbsp | For brushing crust |
| Vanilla Extract 🌸 | 1 tsp | Pure vanilla preferred |
| Milk 🥛 | ¼ cup | Warm for yeast activation |
The flour is the foundation, so grab King Arthur or Gold Medal for that perfect tender crumb. Coconut milk is non-negotiable—it's what gives Aloha bread its signature richness. I always use full-fat canned coconut milk (the kind you'd drink) and chill it first so it's easier to handle. The pineapple filling can be store-bought (like Dole's) or homemade—just make sure it's sweetened, not unsweetened. For the macadamia variation, Trader Joe's has pre-chopped nuts that save time, but toast them first for extra flavor. The butter should be room temp but not melted—just soft enough to mix easily.
No coconut milk? Substitute with heavy cream—it won't be identical, but it'll still taste amazing. Running low on pineapple? Mango or guava jam works in a pinch (about half the amount). The yeast is active dry, but if you've got instant yeast, use 2 tsp instead. For the nuts, walnuts or pecans swap one-for-one if macadamias aren't available. The honey can be swapped for maple syrup if you're avoiding honey, but trust me on this—it's worth it for that authentic touch. If your filling is too runny, mix it with 1 tbsp of flour to thicken it up.
This dough needs time to rise—plan for at least 2 hours (or overnight in the fridge). The bread keeps well at room temperature for 3-4 days in an airtight container, but it's best fresh out of the oven. For longer storage, freeze slices wrapped in plastic—they'll stay soft for up to 3 months. The filling stays gooey when reheated, so pop slices in the toaster or microwave for 10 seconds. Pro tip: Brush the warm bread with extra honey and sprinkle toasted coconut flakes on top—instant Hawaiian vibes every time.
Why You'll Love This Recipe
- No-Knead Magic: I swear by this dough—just mix, let it rise, and bake. The yeast does all the work while I sip coffee.
- Buttery Sweet Payoff: That sugar-butter combo? It caramelizes into a golden crust that cracks open like a fresh-baked secret.
- Breakfast-to-Dessert Star: Toast it with jam for morning, drizzle with honey for an afternoon pick-me-up, or serve warm with butter—it’s always a hit.
- Pantry Staple Power: Uses flour, sugar, and butter you already have. Bake a loaf on Sunday, and you’ve got snacks all week without extra shopping.
Step-by-step instructions for Aloha bread with tropical swirls
Here's how to create that signature Hawaiian sweetness with a perfect buttery crust.
👨🍳 Step 1: Activate the Yeast and Mix the Dough
In a small bowl, combine the 0.25 cup warm milk (about 110°F) with the 2.25 tsp active dry yeast and 0.25 cup granulated sugar. Let it sit for 5-10 minutes until frothy—this means your yeast is alive and ready to work. If it doesn't bubble, start over with fresh yeast.
In a large mixing bowl, whisk together the 4 cups all-purpose flour and 1 tsp salt. Make a well in the center and pour in the yeast mixture, the 1 whole egg, 0.5 cup coconut milk, 0.5 cup unsalted butter, 1 tsp vanilla extract, and 2 tbsp honey. Mix with a wooden spoon until it comes together, then knead by hand for 8-10 minutes until smooth and elastic.
🍳 Step 2: Knead and Let the Dough Rise
Place the dough on a lightly floured surface and knead for another 5 minutes until it's silky and springs back when poked. This step develops the gluten, which gives your bread that perfect texture. Shape the dough into a ball, place it in a lightly greased bowl, cover with a damp towel, and let it rise in a warm place for 1-2 hours or until doubled in size.
I like to give the dough a gentle shake test—if it doesn't spring back quickly when shaken, it's ready for the next step. The warm, humid environment helps the yeast work its magic, creating those airy pockets we want in our bread.
🥘 Step 3: Prepare the Pineapple Filling
While the dough rises, get your tropical filling ready. In a small bowl, mix the 1.5 cups sweetened pineapple filling with the 0.5 cup chopped macadamia nuts. Set this aside—it's time to shape our bread. If your pineapple filling is thick, you can leave it as is. If it's watery, drain it first to prevent a soggy loaf.
Here's the thing—this filling is what makes Aloha Bread special. The pineapple adds moisture and sweetness, while the macadamia nuts give it that signature crunch. Don't skip this step, even if you're tempted to make it simpler!
🔥 Step 4: Shape, Fill, and Second Rise
Once your dough has risen, punch it down to release the air, then divide it into two equal pieces. Roll each piece into a rectangle about 12x8 inches. Spread half of the pineapple mixture evenly over one rectangle, then fold the other rectangle over it to create a sandwich. Seal the edges by pinching them together.
Shape the filled dough into a round loaf, place it seam-side down in a greased 9-inch round cake pan, and let it rise again for 30-45 minutes until it's puffy and nearly fills the pan. This second rise is crucial—it ensures your bread has that light, airy texture we're after.
🔥 Step 5: Bake to Golden Perfection
Preheat your oven to 350°F. Brush the top of the loaf with a little milk, then sprinkle with 0.25 cup toasted coconut flakes for that tropical touch. Bake for 35-40 minutes until the top is golden brown and the internal temperature reaches 190°F.
Let the bread cool in the pan for 10 minutes before transferring it to a wire rack. This resting period prevents it from falling apart when you slice it. The aroma as it bakes will make your kitchen smell like a Hawaiian paradise—worth every minute of waiting!
Pro Tips For Making Aloha Bread
- Melt the Butter Slowly: If you dump cold butter straight into the warm dough, you’ll end up with greasy lumps instead of that buttery, tender crumb. Warm the butter in the microwave for 10-15 seconds first—just until it’s soft enough to mix in smoothly, but not melted. I learned this the hard way when my first batch turned out dense and oily.
- Weigh Your Flour Like a Pro: Aloha bread relies on precise ratios, and scooping flour from the bag packs it too tightly, throwing off your dough. Use a kitchen scale and spoon the flour into the bowl, then level it off with a knife—this keeps your sugar-to-flour ratio consistent and prevents a dry, crumbly texture.
- Don’t Rush the First Rise: Skimping on the first rise (or worse, skipping it) means your bread will be flat and gummy. Let the dough double in size in a warm spot—near the oven with the light on works—until it’s puffy and springs back when poked. I used to cut corners here, and the bread always tasted underproofed.
- Salt the Water, Not the Dough: Aloha bread gets its flavor from the butter and sugar, so over-salting the dough can make it taste harsh. Instead, dissolve the salt in the water you’re using to activate the yeast—this distributes it evenly without overwhelming the sweetness. My grandmother swore by this, and she was right.
Common mistakes when making your aloha bread
Over-Kneading the Dough
I’ve seen this happen more times than I can count—dough that’s been kneaded too long becomes tough and dense, ruining that tender Aloha bread texture. Stop kneading once the dough springs back when poked and feels smooth to the touch (about 8-10 minutes total).
Overworking the gluten creates a chewy loaf instead of the light, fluffy crumb you want. If your dough feels sticky but elastic, it’s ready—don’t keep going! 💪
Skipping the Second Rise
The second rise after shaping is where the magic happens, but many bakers rush this step. If you skip it or cut it short, your bread will be dense and flat. Give it 30-45 minutes until the dough puffs up and nearly fills the pan.
Pro tip: Place your bowl in a warm spot (like a turned-off oven with the light on) to speed up the rise without overproofing.
Using Cold Ingredients
Cold butter or coconut milk can cause the dough to seize up, making it hard to mix and knead. Always use room-temperature butter (soft but not melted) and ensure your coconut milk is chilled but not frozen.
Cold ingredients slow yeast activation, leading to a longer rise time and weaker structure. I like to let my butter sit out for 30 minutes before starting—just enough to soften it completely.
Underfilling the Loaf
If you spread too little pineapple filling, the flavor won’t be balanced, and the bread might collapse during baking. Use the full 1.5 cups of filling to ensure every slice has that tropical burst.
For extra insurance, drain any excess liquid from the filling before spreading—watery fillings can make the bread gummy. Think of it like a sandwich: you want that filling to shine, not hide!
Baking at Wrong Temperature
Ovens vary, but 350°F is non-negotiable for Aloha bread. Too high, and the crust burns before the center cooks; too low, and the bread stays doughy inside. Use an oven thermometer to check your oven’s accuracy—many run hot or cold.
If your bread browns too quickly, tent it with foil. The internal temp should hit 190°F for perfect doneness. 🌡️
Not Brushing with Milk
That glossy, golden crust isn’t just luck—it’s the milk brush! Skipping this step leaves your bread dry and dull. Brush the top with milk (or coconut milk for extra flavor) before baking to create a tender, caramelized crust.
I also like to sprinkle toasted coconut flakes right after brushing for that authentic Hawaiian touch. It’s a small step with a big payoff!
Nutrition facts
Frequently asked questions
Can I make Aloha bread without pineapple?
While pineapple is traditional, you can substitute with 1.5 cups of sweetened mango jam or 1 cup of guava paste for a different tropical flavor. For nut lovers, try 1 cup of macadamia nut butter mixed with 0.5 cup coconut cream—it creates a rich, gooey center. Just adjust sweetness to taste, as some fillings are sweeter than others.
Why did my Aloha bread turn out dense?
Dense bread usually means the dough didn't rise enough or was over-kneaded. Make sure your yeast is active (it should bubble in 5-10 minutes with warm milk), and give the dough a full 1-2 hour rise—place the bowl in a warm spot (like a turned-off oven with the light on) to help. Also, avoid kneading beyond 8-10 minutes—the dough should be smooth but still slightly sticky.
How do I store Aloha bread to keep it fresh?
Store wrapped in an airtight container at room temperature for 3-4 days, or freeze slices for up to 3 months. To reheat, wrap slices in foil and warm in a 350°F oven for 5-7 minutes—this restores the filling's gooey texture. For extra freshness, brush warm slices with melted butter and toasted coconut flakes before serving.
Can I make Aloha bread in a different shape?
Yes! While the round loaf is traditional, you can shape it into a rectangle (like a panettone) or even individual buns for Hawaiian-style breakfast rolls. For buns, divide the dough into 8 equal pieces, shape into balls, add a small spoonful of filling, seal, and bake in a greased muffin tin for 18-20 minutes** at 350°F. The baking time will vary slightly based on shape.
What’s the best way to serve Aloha bread?
Warm slices make the best toast—spread with butter or cream cheese and sprinkle with toasted coconut flakes. For dessert, drizzle with warm caramel sauce or serve with vanilla ice cream. Try it as a side with grilled ham and pineapple for a Hawaiian plate lunch vibe. The bread also freezes beautifully—slice and freeze for quick breakfast toast all week!