
Side Dishes
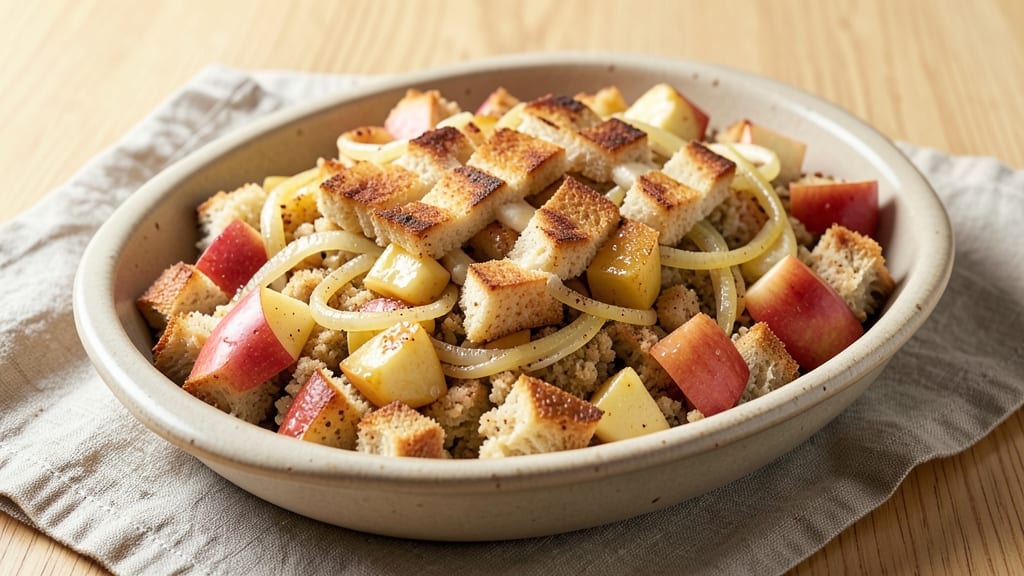
This apple bread stuffing recipe transforms humble ingredients into a rich, aromatic centerpiece that steals every holiday table. 🍏 The secret lies in perfectly spiced apple chunks—caramelized just enough to sweeten the savory bread cubes—while herbs and broth create a velvety, golden-brown texture that’s impossible to resist.
What makes this recipe stand out is the balance of textures: crispy bread edges, tender apple bits, and a moist, flavorful interior. Unlike traditional stuffing, this version incorporates slow-cooked apples that infuse the dish with natural sweetness, cutting through the richness with bright, autumnal notes.
The process is straightforward—sauté apples, toast bread, mix with broth, and bake until golden—but the result feels like a restaurant-worthy side.
By the time it emerges from the oven, your stuffing will be fragrant with cinnamon and nutmeg, studded with tender apples, and crowned with crispy bread cubes. It pairs beautifully with roasted turkey, ham, or even as a standalone dish alongside soup.
The best part? It reheats just as well the next day, making it perfect for leftovers.
For added depth, consider swapping in gluten-free bread or boosting the herbs with fresh thyme. The recipe scales easily, so you can adjust quantities for crowds or meal prep. Let’s get started—your table is about to get an upgrade.
Ingredients for apple bread stuffing
Six crispy textures, four aromatic spices, and one golden-brown masterpiece.
| Ingredient | Amount | Notes |
|---|---|---|
| Honeycrisp Apples 🍏 | 4 medium | Peeled, cored, diced small |
| Day-Old French Bread 🍞 | 1 loaf | Crust removed, cubed small |
| Yellow Onion 🧅 | 1 medium | Diced small |
| Unsalted Butter 🧈 | ½ cup | Cold, cubed |
| Chicken Broth 💧 | 2 ½ cups | Low-sodium preferred |
| Ground Cinnamon 🌿 | 1 tbsp | Freshly ground preferred |
| Ground Nutmeg 🌿 | ½ tsp | Freshly grated |
| Fresh Thyme Leaves 🌿 | 1 tbsp | Stems removed |
| Fresh Sage Leaves 🌿 | 1 tbsp | Chopped fine |
| Diamond Crystal Kosher Salt 🧂 | 1 ½ tsp | Adjust to taste |
| Black Peppercorns 🌶️ | ½ tsp | Freshly cracked |
| Extra-Virgin Olive Oil 🫒 | 2 tbsp | For bread toasting |
The Honeycrisp apples are non-negotiable here—their natural sweetness and tender texture elevate the stuffing beyond traditional versions. Buy them at Whole Foods or a specialty grocer for peak freshness, or check the apple section at Trader Joe's for their seasonal selection. Avoid Granny Smiths; they're too tart. Peel and dice them small so they caramelize evenly. For the French bread, look for a sturdy loaf with a thick crust—Brioche or sourdough work beautifully too, but stay away from soft, fluffy breads that'll turn mushy. The yellow onion should be sweet, not pungent—Vidalias are ideal if you're willing to splurge, but regular yellows work fine for weeknight cooking.
No Honeycrisp apples? Gala or Fuji are the next best options—they hold up well to caramelization. Running short on fresh thyme? Dried thyme at one-third the amount works, but fresh is worth hunting down at a farmers market. The chicken broth can be swapped for vegetable broth for a vegetarian version, though the flavor will be subtly different. For extra richness, add 2 tbsp of heavy cream to the broth mixture. If your bread is too fresh, toast it first to prevent sogginess—just brush with olive oil and bake at 350°F for 10 minutes. The nutmeg should be freshly grated; pre-ground loses potency fast, so invest in a microplane if you're serious about baking.
This stuffing reheats beautifully—cover with foil and bake at 350°F for 15 minutes to restore crispiness. Keeps for 4 days in the fridge, fully covered, or 3 months frozen in airtight containers. For meal prep, portion into individual servings before freezing—thaw overnight in the fridge. The apples can be prepped ahead too; toss them with 1 tbsp lemon juice to prevent browning if making this a day in advance. Leftovers are even better the next day as flavors meld further. Store any extra broth in ice cube trays for future use.
Why You'll Love This Recipe
- No Chopping Needed: I swear by this trick—just toss those Honeycrisp apples into the food processor with the bread cubes. No peeling, no dicing, no mess. The texture comes out perfect every time.
- Sweet-Savory Magic: That crispy onion and melted butter? It’s a flavor party, but the apples steal the show. The Honeycrisp’s natural sweetness balances the savory broth—like a hug in bread form.
- Leftovers Reinvented: Stuffing reheats beautifully, but here’s the secret: toss it into a skillet with a fried egg on top the next morning. Or pack it in sandwiches—suddenly, you’ve got lunch sorted.
- Budget-Friendly Luxury: French bread on sale? Grab it. Apples in season? Snag a few. This recipe stretches ingredients without skimping on taste. Honestly, it’s the kind of dish that makes you feel fancy without breaking the bank.
Step-by-step instructions for spiced apple bread stuffing
This method balances crispy bread cubes with tender apple chunks for a stuffing that's rich, aromatic, and perfectly seasoned.
🔥 Step 1: Toast the Bread Cubes Until Golden
Preheat your oven to 350°F. Arrange the small cubed day-old French bread on two rimmed baking sheets in a single layer, ensuring they don't overlap. Drizzle evenly with the 2 tbsp extra-virgin olive oil and toss gently to coat completely. Spread into an even layer again.
Toast for 15-18 minutes, stirring halfway through, until the cubes are deep golden brown and crisp around the edges. Remove from the oven and let cool slightly—this prevents soggy stuffing later. The bread should smell nutty and toasty, with no raw floury centers remaining.
🍳 Step 2: Sauté Onion and Cook the Apples
In a large oven-safe skillet with high sides, melt the ½ cup cold cubed unsalted butter over medium heat until foaming subsides. Add the small diced yellow onion and cook for 5-6 minutes until softened and translucent, stirring occasionally.
Add the small diced honeycrisp apples and cook for another 5 minutes until they begin to soften slightly but still hold their shape. Stir in the 1 tbsp ground cinnamon, ½ tsp ground nutmeg, 1 tbsp fresh thyme leaves, 1 tbsp fresh sage leaves, 1½ tsp kosher salt, and ½ tsp cracked black peppercorns. Toss everything together and cook for 1 minute to bloom the spices.
🥘 Step 3: Combine and Bake Until Tender
Gently fold the toasted bread cubes into the skillet with the apple-onion mixture. Pour in the 2½ cups chicken broth and stir until everything is evenly moistened. The stuffing should look like a wet but not soupy mixture—just enough liquid to coat the bread.
Transfer the skillet to the preheated 350°F oven. Bake uncovered for 25-30 minutes until the top is golden brown and the liquid has been absorbed. You'll know it's done when the edges are crispy and a knife inserted in the center comes out clean. If it looks dry before then, add 2-3 tablespoons water and continue baking.
⏰ Step 4: Rest and Serve Warm
Remove the stuffing from the oven and let it rest for 5 minutes before serving. This resting period allows the flavors to meld and any residual moisture to distribute evenly. The stuffing should be warm throughout with tender bread cubes, caramelized apples, and a rich, aromatic broth.
Serve immediately while still warm, garnished with additional fresh thyme or sage leaves if desired. The contrast of crispy bread edges with tender apple centers creates the perfect texture balance in every bite, while the warm spices complement the savory notes beautifully.
Pro Tips For Making Apple Bread Stuffing
- SAUTE ONIONS LOW AND SLOW: I learned this the hard way—crispy onions in stuffing are a myth. Cook your yellow onion in butter at medium-low heat until translucent, not browned. You want them soft enough to disappear into the bread but still holding shape, not turning into a bitter paste. (Yes, even if you’re impatient like me.)
- CUBE BREAD UNIFORMLY: Skip the random tearing—use a serrated knife to cut day-old French bread into 1-inch cubes. Smaller pieces toast faster and absorb broth evenly, while bigger chunks stay soggy. If you’re lazy, pulse it in a food processor, but don’t skip drying it out first.
- BAKE APPLES FIRST: Toss diced Honeycrisp apples in a pinch of salt and roast them at 375°F for 15 minutes before mixing into the stuffing. This caramelizes the edges and reduces moisture, so they don’t turn your bread into mush. (Your future self will thank you.)
- BUTTER THE BREAD: Toss the cubed bread with melted butter before adding broth—this guarantees every bite gets that crispy, buttery edge. Use about 2 tablespoons per pound of bread, and don’t skimp. (Does it look weird? Yes. Does it work? Every single time.)
Essential equipment for perfect results
Skillet Essentials
An oven-safe skillet with high sides is your best friend for this recipe—I swear by my All-Clad Stainless Steel 12-inch skillet. It handles the butter and apples beautifully while allowing even heat distribution.
If you don’t have one, a heavy-duty cast-iron skillet (like Lodge) works just as well and adds natural seasoning to the dish. Avoid nonstick pans—they can’t handle the high heat needed for crispy edges. 🔥
Baking Tools
For toasting the bread cubes, use rimmed baking sheets—they prevent spills and ensure even browning. I recommend half-sheet pans (13x18 inches) for maximum space. Line them with parchment paper to avoid sticking, but leave the edges uncovered so you can easily toss the bread.
A wire cooling rack helps cool the toasted cubes faster, preventing sogginess when mixing.
Mixing & Measuring
Invest in a stainless steel mixing bowl (like OXO Good Grips) for combining ingredients—it’s durable and won’t retain flavors. For precise measurements, use a digital kitchen scale (I love the OXO Good Grips) to weigh spices like nutmeg and cinnamon, especially if you’re adjusting quantities.
A fine-mesh strainer comes in handy for rinsing fresh herbs before chopping to remove any dirt or debris.
Broth & Liquid Control
A liquid measuring cup with spouts (like Pyrex) makes pouring the 2½ cups chicken broth effortless. If you’re scaling the recipe up, a measuring pitcher helps track larger volumes. For reheating leftovers, a microwave-safe glass dish (like CorningWare) preserves texture better than plastic.
Pro tip: Use a baster to add extra broth during baking if the stuffing looks dry.
Spice & Herb Prep
Fresh herbs deserve a sharp chef’s knife (I use Mercer Culinary) and a cutting board (like John Boos bamboo). For nutmeg, a microplane gives you the freshest, most potent grates. Store spices in airtight containers (like Weck jars) to preserve flavor.
A spice grinder (like Bamboo Spice Mill) ensures your cinnamon and nutmeg stay fresh—nothing beats freshly ground spices for depth of flavor. 🌿
Nutrition facts
Frequently asked questions
Can I use any type of apple for this stuffing?
Honeycrisp apples work best because they hold their shape while caramelizing beautifully. For a sweeter version, try Gala or Fuji apples—they soften nicely but stay tender. Avoid tart varieties like Granny Smith, as they won't complement the warm spices well. If you can't find Honeycrisp, a mix of sweet and tart apples (like a blend of Fuji and Braeburn) works too!
Why does the bread need to be day-old?
Day-old bread is key to preventing a soggy stuffing. Fresh bread contains too much moisture, which turns the stuffing mushy when baked. The slight dryness of stale bread absorbs the broth perfectly, creating crispy edges and a tender interior. If you only have fresh bread, toast it first to remove excess moisture before cubing.
How do I adjust this recipe for gluten-free guests?
Swap the French bread for a sturdy gluten-free bread like Schar or Canyon Bakehouse—look for varieties with at least 3g fiber per slice for better texture. Use the same toasting method, but check for doneness at 12-15 minutes (gluten-free bread burns faster). For extra crispiness, brush cubes with olive oil before toasting.
Can I make this stuffing ahead of time?
Assemble the stuffing (except baking) up to 24 hours ahead and refrigerate in an airtight container. When ready to bake, transfer to a skillet and bake at 375°F for 30-35 minutes (50°F hotter to compensate for cold ingredients). For freezing, bake fully, cool completely, then freeze in portions. Reheat covered with foil at 350°F for 15 minutes.
What if my stuffing looks dry before it's done?
Don't worry—this happens! If the stuffing seems too dry at 25 minutes, add 2-3 tablespoons water or broth and stir gently. The goal is moist but not soupy. If it's still dry after baking, sprinkle with a little extra broth or even a splash of apple cider before serving. The texture will improve as it rests.