
Main Courses
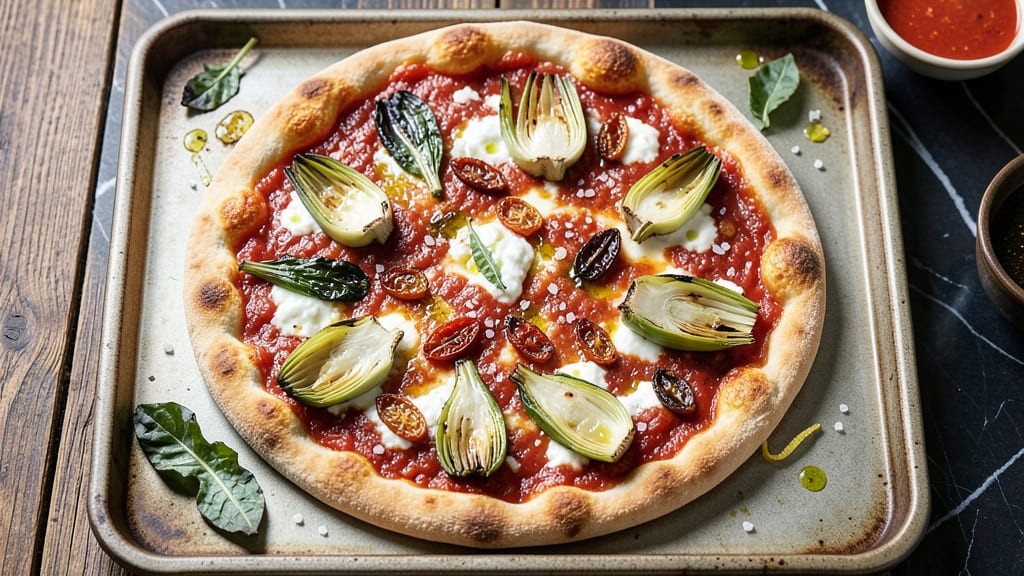
This artichoke flatbread pizza delivers a crispy crust and herbed artichoke filling that transforms ordinary pizza night into a gourmet experience. The secret lies in a simple dough that bakes up perfectly crisp at the edges while staying tender inside, paired with a vibrant artichoke-pesto base that adds Mediterranean flair.
I developed this recipe after craving something heartier than traditional pizza but lighter than a full flatbread—it’s the ideal balance of textures and flavors.
The beauty of this dish is its versatility—vegetarian-friendly yet packed with rich, savory depth from sun-dried tomatoes, garlic, and fresh herbs. Unlike dense flatbreads, this version stays crisp thanks to a precise baking technique that ensures the crust achieves that satisfying crunch without sacrificing the soft, chewy center.
The artichoke filling, infused with lemon zest and parsley, adds a bright, herby contrast that cuts through the richness of the cheese.
By the time it emerges from the oven, you’ll have a pizza with golden, shatteringly crispy edges, a tender yet sturdy crust, and a filling so flavorful it’ll disappear faster than you can say "second slice."
The combination of artichokes, garlic, and herbs creates a taste experience that’s both comforting and sophisticated—perfect for a weeknight dinner or a special occasion.
Whether you’re serving it as a main course or sharing with friends, this recipe delivers restaurant-quality results without the fuss. The dough comes together in minutes, and the toppings are simple yet impactful. Let’s get started on creating your next favorite pizza night.
Ingredients for artichoke flatbread pizza
Crispy crust meets herbed artichoke filling—this pizza delivers restaurant-quality texture with simple, vibrant ingredients.
| Ingredient | Amount | Notes |
|---|---|---|
| All-Purpose Flour 🌾 | 2 ½ cups | Spray dough ball with olive oil before rolling |
| Instant Yeast 🍞 | ¼ tsp | Active dry works too |
| Granulated Sugar 🍚 | ¼ tsp | Enhances yeast activation |
| Salt 🧂 | 1 tsp | Diamond Crystal preferred |
| Extra-Virgin Olive Oil 🫒 | ½ cup | High-quality, fruity variety |
| Warm Water 💧 | 1 cup | 110°F for optimal yeast |
| Marinated Artichoke Hearts 🍃 | 1 cup | Drained and chopped finely |
| Sun-Dried Tomatoes 🍅 | ½ cup | Chopped, oil-packed preferred |
| Garlic Cloves 🧄 | 4 cloves | Minced, fresh preferred |
| Fresh Parsley 🌿 | ¼ cup | Chopped, stems removed |
| Lemon Zest 🍋 | 1 tsp | Brightens artichoke flavor |
| Shredded Mozzarella Cheese 🧀 | 2 cups | Part-skim for texture balance |
| Parmesan Cheese 🧀 | ½ cup | Freshly grated from block |
| Fresh Basil Leaves 🌿 | ⅛ cup | Torn, for final garnish |
| Extra-Virgin Olive Oil 🫒 | 1 tbsp | For drizzling after baking |
The flour is non-negotiable here—King Arthur or Caputo Tipo 00 for that perfect crisp-chewy balance. If you can't find either, Bread flour works in a pinch, but the texture won't be quite as refined. For the artichokes, Whole Foods or Trader Joe's carry the best marinated hearts—avoid those sad little jars with murky liquid. The sun-dried tomatoes should be oil-packed, not dried. Mutti or La Bottega brands are my go-to, but any oil-packed will do. Fresh herbs are key: parsley and basil should be bright green with no wilt. If you're using dried, reduce to one-third the amount, but honestly, fresh makes all the difference in that herby artichoke filling.
No sun-dried tomatoes? Roasted cherry tomatoes at half the amount work surprisingly well. Short on artichokes? Spinach or roasted zucchini adds a similar texture, though the flavor won't be identical. The cheese is where you can get fancy—fresh mozzarella from the deli counter melts better than pre-shredded, but if that's all you've got, it'll still taste great. For the olive oil, California Olive Ranch or Colavita are reliable choices, but any extra-virgin with a peppery kick will do. The lemon zest might seem like a small detail, but it brightens the whole dish—don't skip it. If you're feeling ambitious, toast the garlic cloves in olive oil for 30 seconds before mincing to deepen their flavor.
This dough keeps beautifully—3 days in the fridge wrapped in plastic or 3 months frozen. Let it come to room temp before rolling. The artichoke filling can be prepped ahead and stored for 2 days in an airtight container. For that perfect crisp, bake straight from the fridge on a preheated stone—500°F for 12-15 minutes. The cheese will bubble and brown, and you'll know it's done when the crust is golden and shattering at the edges. Leftovers? Slice and reheat in a 350°F oven for 5-7 minutes—the crust stays crispy, I promise.
Why You'll Love This Recipe
- No-Knead Magic: I swear by this dough—just mix, let it rise while you make dinner, and boom. The yeast does all the work; I just stir and wait. That olive oil in the dough? It keeps it tender without fuss.
- Artichoke Obsession: The star here isn’t just the flatbread—it’s the artichokes. Marinated in olive oil, their briny, tender hearts melt into the dough like a hug. (Yes, even if I burn the edges.)
- Weeknight Hero: This feeds four for under $10 and takes less time than ordering takeout. Freeze leftovers flat, then reheat in seconds—no sad, soggy slices here.
- One-Pan Wonder: Sheet pan only. One bowl for dough, one for toppings. I’ll be real: my kitchen counters stay cleaner than my toddler’s hands after this.
Step-by-step instructions for artichoke flatbread pizza
Here's how to craft a perfectly crisp flatbread with a herbed artichoke filling that shines.
Prepare the Yeast Dough Base
In a large mixing bowl, combine the 2.5 cups all-purpose flour, 0.25 tsp instant yeast, 0.25 tsp granulated sugar, and 1 tsp salt. I like to whisk these dry ingredients together first to distribute the yeast evenly throughout the flour. This prevents clumpy yeast that can lead to uneven rising.
Next, add the 0.5 cup extra-virgin olive oil and mix with a wooden spoon until the mixture resembles coarse crumbs. Pour in the 1 cup warm water (about 110°F) and stir vigorously with a wooden spoon or your hands until a shaggy dough forms. The dough should come together but still feel slightly sticky—this is normal. Cover the bowl with a damp kitchen towel and let it rest for 15 minutes at room temperature. This initial rest helps the gluten relax and makes the dough easier to handle later.
Knead and Shape the Flatbread
After the dough rests, turn it out onto a lightly floured surface and knead for 5-7 minutes until smooth and elastic. I press down firmly with the heels of my hands and fold the dough over itself, rotating the bowl as I work. The dough should spring back slowly when pressed—this indicates proper gluten development for that perfect crispy crust.
Once kneaded, divide the dough into 4 equal portions (about 8 ounces each) and roll each into a 12-inch round. I use a rolling pin, but you can also press the dough with your hands for a rustic texture. Lightly spray each round with extra-virgin olive oil (using the 1 tbsp reserved for this) and let them rest on a floured surface for 10 minutes while you prepare the filling. This oil spray ensures a crispy exterior and prevents sticking during baking.
Assemble the Herbed Artichoke Filling
In a food processor, finely chop the 1 cup marinated artichoke hearts (drained and patted dry) along with the 0.5 cup sun-dried tomatoes and 4 cloves garlic. Pulse until the mixture resembles a chunky paste—you want texture but not a smooth sauce. Transfer this to a medium bowl and stir in the 0.25 cup chopped fresh parsley, 1 tsp lemon zest, 2 cups shredded mozzarella, and 0.5 cup freshly grated parmesan. The lemon zest brightens the earthy artichoke flavor, while the parsley adds freshness that cuts through the richness of the cheese.
Spread the artichoke mixture evenly over each of the 4 flatbread rounds, leaving a ½-inch border around the edges. This border ensures the crust stays crispy while the center melts into a gooey, herbed delight. I like to press the filling down gently with the back of a spoon to help it adhere to the dough.
Bake to Crispy Perfection
Preheat your oven to 425°F and line a baking sheet with parchment paper. Place the assembled flatbread pizzas on the prepared sheet, spacing them about 1 inch apart to allow for even browning. Bake for 12-14 minutes until the edges are deep golden brown and the cheese is fully melted and bubbly. The crust should be crisp enough to hold its shape when lifted, while the filling should be heated through but still slightly soft in the center.
For that final touch, transfer the baked flatbreads to a wire rack and let them cool for 2-3 minutes. Then, drizzle each with a little more extra-virgin olive oil and scatter the 0.125 cup torn fresh basil leaves on top. The basil adds a vibrant pop of color and a fresh, aromatic finish that complements the artichoke's earthiness. Serve immediately while the crust is still crisp and the cheese is melty—this is when it tastes best!
Pro Tips For Making Artichoke Flatbread Pizza
- Preheat That Pan: Get your cast-iron or heavy skillet screaming hot—think 450°F—before adding the dough. I learned this the hard way when my first batch turned out greasy instead of crispy. The dough needs that shock of heat to lock in the olive oil and set the crust properly.
- Use Warm Olive Oil: Warm your extra-virgin olive oil (just enough to coat the pan) for 30 seconds before adding the dough. Cold oil makes the crust soggy, and this little step guarantees a golden, shatterable base. Yes, even if you’re impatient like me—wait for it.
- Skip the Overmixing: Once you add the yeast and sugar to the flour, mix just until combined—about 2 minutes by hand. Overworking the dough kills the gluten and makes the flatbread dense. My grandmother swore by this, and she was right: less effort here means better texture later.
- Press the Dough Evenly: Use a rolling pin or your hands to press the dough into the pan until it’s about ¼-inch thick, but don’t panic if it tears. Patch it up with wet flour—just press it down firmly. Uneven thickness means some parts burn while others stay doughy, and nobody wants that.
Essential equipment for this recipe
Must-Have Tools
First, grab a 12-inch pizza stone or baking sheet—this is non-negotiable for that perfect crispy crust. I swear by the Ooni Pizza Stone for even heat distribution, but a Ceramic Pizza Stone from Lodge is a budget-friendly alternative.
If you don’t have a stone, a heavy-duty baking sheet lined with parchment works in a pinch. 🔥
Dough Essentials
For shaping, a rolling pin is your best friend, but I’ve also had great results using my hands for a rustic texture. A damp kitchen towel keeps the dough from drying out during the 15-minute rest.
And don’t skip the spray bottle—just a light mist of water or olive oil on your work surface prevents sticking when rolling. A digital kitchen scale ensures precise dough portions, but measuring cups work too.
Filling Prep Gear
A food processor is ideal for chopping artichokes and sun-dried tomatoes into a chunky paste, but a sharp chef’s knife and cutting board work just as well. For grating cheese, a microplane gives you the finest texture, but a box grater does the job.
A small mixing bowl holds your herbed filling while you assemble the pizzas. Pro tip: Use a spatula to spread the filling evenly—it’s more controlled than your fingers.
Baking Setup
Preheat your oven to 425°F with the stone or sheet inside for at least 30 minutes—this ensures even cooking. A pizza peel (like the Ooni Steel Peel) makes transferring pizzas onto the stone effortless, but a long metal spatula works if you’re baking directly on a sheet.
For the final touch, keep fresh basil and extra-virgin olive oil ready in small bowls for garnishing right after baking. ✨
Optional Upgrades
If you’re feeling fancy, a pizza wheel makes slicing clean cuts, but a sharp serrated knife is just as effective. For extra crispiness, try a combination of the stone and broiler in the last 1-2 minutes of baking.
And if you love artichokes, invest in a mandoline slicer for perfectly thin rounds to use as a topping—though they’re optional here. The key is keeping your tools clean and organized so you can move quickly during assembly. 💪
Nutrition facts
Frequently asked questions
Can I make this pizza without a pizza stone?
A pizza stone gives the best crispy crust, but you can absolutely bake this flatbread without one! Use a heavy-duty baking sheet lined with parchment paper for even heat distribution. For extra crispiness, place the sheet on the lowest oven rack and preheat for 30 minutes before baking. The edges will still get golden and shatteringly crisp, though the bottom might be slightly softer.
How do I store leftovers to keep the crust crispy?
Store cooled slices in an airtight container at room temperature for up to 2 days. To reheat, place slices on a baking sheet and warm in a 350°F oven for 5-7 minutes until the crust is crisp again. For longer storage, freeze slices between parchment paper for up to 1 month. Thaw at room temperature before reheating. The key is reheating quickly to restore that perfect texture!
What can I substitute if I don't have marinated artichoke hearts?
Fresh artichoke hearts work beautifully if you can trim and steam them first, but you can also use roasted zucchini or eggplant for texture. For a similar flavor profile, try sun-dried tomatoes only (increase to ¾ cup) plus ½ cup chopped spinach or roasted mushrooms. The lemon zest and parsley will still brighten the dish—just adjust seasoning to taste.
Why did my crust turn out chewy instead of crispy?
Chewy crusts usually happen from one of three things: not enough preheating (425°F for 30+ minutes), overworking the dough, or insufficient olive oil spray. For crispiness, ensure your baking surface is hot, spray the dough generously with oil before baking, and avoid pressing too hard when shaping. The ½-inch border of filling is also key—too much filling can make the crust soggy. Try baking for 1-2 extra minutes if needed.
Can I make this pizza gluten-free?
Yes! Swap the all-purpose flour for a 1:1 gluten-free flour blend (like Bob's Red Mill) and add ½ tsp xanthan gum to improve texture. You may need to adjust the water slightly—start with ¾ cup and add more as needed. Let the dough rest 20 minutes longer since gluten-free doughs develop differently. The crust will be slightly denser but still crisp at the edges.