
Side Dishes
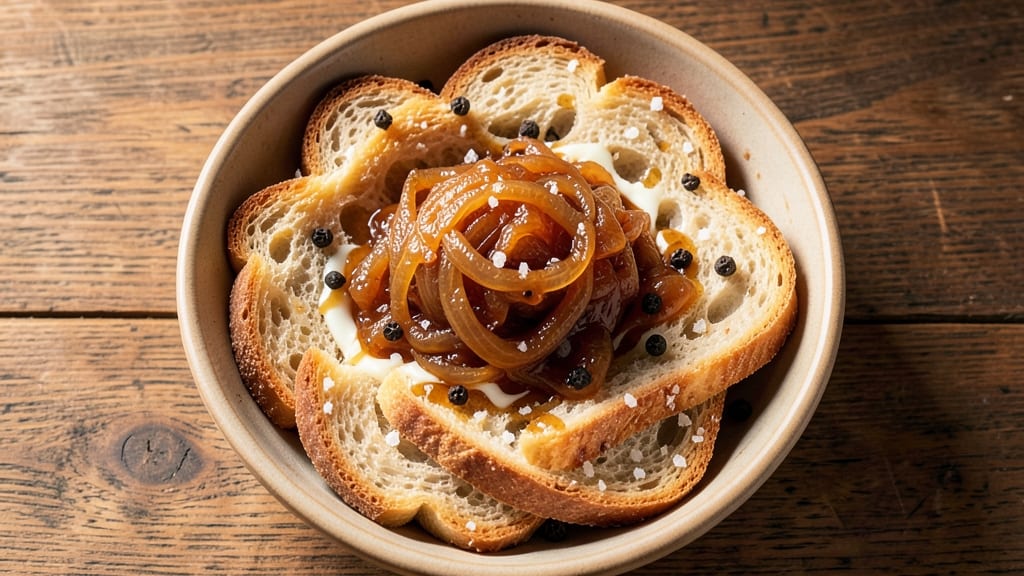
This artisan onion bread recipe transforms simple dough into golden, crispy loaves with layers of caramelized onions—every bite delivers sweet, savory perfection. The secret lies in slow-cooked onions that melt into the dough, creating pockets of flavor with each pull-apart tear.
I’ve perfected the balance between a chewy interior and that coveted crispy crust, ensuring your bread rivals any bakery’s.
The process begins with a simple yet robust dough that develops depth during a long fermentation, while the onions caramelize until deep amber and jammy. No special equipment is needed—just time, patience, and a hot oven to create that signature crackling crust.
This recipe delivers restaurant-quality results without shortcuts, making it ideal for holidays, dinner accompaniments, or gifting.
By the time you pull it from the oven, you’ll have a loaf with a shatteringly crisp exterior and a soft, pillowy center infused with sweet onions.
The aroma alone will have everyone gathered in the kitchen, and the texture—tender yet sturdy—makes it perfect for slicing, tearing, or serving alongside soups and stews. Let’s get started on this bread that’s as impressive as it is delicious.
For extra flair, brush the baked loaf with melted butter or egg wash before serving, and score the top in a decorative pattern before baking. The possibilities for customization are endless, from adding herbs to the dough to experimenting with different onion varieties.
This is bread that feels like a labor of love—and every bite will prove it.
Ingredients for artisan onion bread
Golden crust, jammy onions, and tender dough—just these ingredients transform simple bread into showstopping art.
| Ingredient | Amount | Notes |
|---|---|---|
| Yellow Onions 🧅 | 4 large | Peeled and halved lengthwise |
| Unsalted Butter 🧈 | ½ cup | Cold, cut into pieces |
| All-Purpose Flour 🌾 | 5 cups | Plus 1 tbsp for dusting |
| Instant Yeast 🍞 | 2 ¼ tsp | Or 1 packet active dry |
| Granulated Sugar 🍚 | 1 tbsp | For yeast activation |
| Salt 🧂 | 1 ½ tsp | Diamond Crystal preferred |
| Warm Water 💧 | 1 ¼ cups | 110°F for yeast activation |
| Large Eggs 🥚 | 2 whole | Room temperature for dough |
| Extra-Virgin Olive Oil 🫒 | 2 tbsp | For dough and brushing |
| Cornmeal 🌽 | ½ cup | For dusting baking sheet |
| Coarse Sea Salt 🧂 | ½ tsp | For sprinkling before baking |
| Fresh Parsley 🌿 | ¼ cup | Chopped, for garnish (optional) |
The onions are non-negotiable here. Sweet yellow onions caramelize best, but red or Vidalia work too. I grab the big 5 lb bags at Costco—cheaper and lasts forever. For the dough, King Arthur flour is my go-to, but any all-purpose works. The yeast? Fresh is ideal, but that single-use packet in the back of your pantry is fine. Just make sure it's not expired—yeast is like milk, it goes bad. The butter should be cold but not rock-hard—press a piece, it should dent slightly but not melt.
No unsalted butter? Vegan butter or coconut oil works in a pinch, though the flavor won't be identical. Short on parsley? Dried oregano at half the amount adds a similar earthy note. The water needs to be warm but not hot—think lukewarm bathwater. Too hot and you kill the yeast. Too cold and it won't activate. For the caramelized onions, patience is key. I let mine cook for 45-60 minutes until deep amber, stirring occasionally. The longer they cook, the sweeter they get—don't rush this step.
This dough needs time to rise—at least 2 hours, but overnight in the fridge is ideal. The caramelized onions can be made 2 days ahead and stored in the fridge. For the final loaf, brush with melted butter or olive oil right after baking—it's the secret to that bakery-style shine. The bread keeps well wrapped at room temp for 3 days or frozen for 3 months. I slice it fresh from the oven and serve it warm with extra butter—simple, but always impressive.
Why You'll Love This Recipe
- No-Knead Magic: I swear by this dough—just mix, let it rise, and bake. No rolling, no fuss, just hands-off perfection while you sip coffee or scroll through your phone. That caramelized onion jam baked right into the crust? It’s the easy upgrade everyone forgets they need.
- Sweet-Savory Crust: The onions caramelize into a sticky, golden blanket while the butter melts into the dough, creating a crust that’s crisp on the outside but pillowy inside. Honestly, the first time I bit into it still warm, I nearly dropped my fork. That balance of sweetness from the sugar and sharpness from the onions? Chef’s kiss.
- Lunchbox Hero: Between us, this bread is my go-to for packing lunches—it stays fresh for days, and the flavor only gets better. Slice it thick for sandwiches, toast it for breakfast, or just eat it straight from the loaf. My kids used to complain about "boring bread," but now they fight over the last slice. (Yes, even on a Tuesday night.)
- Budget Baking Win: You’re using pantry staples here—flour, yeast, butter—and onions are dirt cheap. A single loaf costs me less than half what store-bought artisan bread does, and it actually tastes like it belongs in a bakery. Plus, the leftovers? They disappear faster than I can reheat them.
Step-by-step instructions for artisan onion bread
Here's how to craft golden layers of caramelized onions and a crackling crust that'll make your kitchen smell like a Parisian bakery.
Caramelize the Onions for Sweet Depth
Heat the 0.5 cup unsalted butter in a large skillet over medium-low heat. Add the 4 large peeled and halved yellow onions with their flat sides down. Cook for 30-35 minutes, stirring occasionally, until the onions are deep golden brown and tender enough to mash with a fork.
This slow cooking transforms the onions into sweet, jammy layers that'll melt into your bread. If the butter starts to brown too quickly, reduce the heat—you want gentle caramelization, not burning. When they're ready, transfer the onions to a bowl and let them cool slightly before mixing into the dough.
Mix the Dough and Incorporate Onions
In a large bowl, whisk together 5 cups all-purpose flour, 2.25 tsp instant yeast, 1 tbsp granulated sugar, and 1.5 tsp salt. In a separate bowl, combine the 1.25 cups warm water (about 110°F), 2 whole room-temperature eggs, and 2 tbsp extra-virgin olive oil. Pour the wet ingredients into the dry and stir until a shaggy dough forms.
Turn the dough onto a lightly floured surface and knead for 8-10 minutes until smooth and elastic. Add the cooled caramelized onions and any released juices, kneading until fully incorporated. The dough should be soft but not sticky—if it is, add 1 tbsp more flour. Cover with a damp towel and let rise in a warm place for 1 hour or until doubled in size.
Shape and Layer for Onion Perfection
Punch down the risen dough and divide it into 4 equal portions. Roll each portion into a 12-inch circle about ½-inch thick. On a floured surface, layer 1 cup of the caramelized onions evenly over each circle, leaving a ½-inch border around the edges. Gather the edges and pinch to seal, then roll each into a 12-inch log.
Here's the trick: place each log seam-side down in a 9x13-inch loaf pan lined with parchment paper. Brush the tops with 1 tbsp olive oil and sprinkle with 0.5 tsp coarse sea salt. Let rise again for 30-45 minutes until puffy and nearly touching the top of the pan.
Bake to Crispy, Golden Greatness
Preheat your oven to 375°F. Sprinkle 0.5 cup cornmeal evenly over the baking sheet, then carefully transfer the risen loaves onto it. Bake for 25-30 minutes until the crust is deep golden brown and sounds hollow when tapped on the bottom. If the tops brown too quickly, tent loosely with foil.
For that signature crispy crust, brush the tops with 1 tbsp olive oil after 15 minutes of baking. The bread is done when the internal temperature reaches 190°F. Let cool in the pan for 10 minutes, then transfer to a wire rack. Garnish with 0.25 cup chopped fresh parsley if desired.
Slice and Serve Warm
Slice the bread while still warm for the best texture—each piece should reveal those beautiful caramelized onion layers. Serve immediately with extra butter or alongside your favorite soups. The crust should be shatteringly crisp, while the interior remains soft and pillowy, with pockets of sweet, jammy onions throughout.
This bread keeps well at room temperature for 2 days wrapped in a clean kitchen towel, or you can freeze slices for up to 3 months. The flavors only deepen as it sits, making it perfect for meal prep!
Pro Tips For Making Artisan Onion Bread
- Thin the Onion Slices: Cut them paper-thin—no thicker than 1/16-inch—so they caramelize evenly instead of turning mushy. I used to eyeball it and ended up with chewy, undercooked onion bits that ruined the texture.
- Use Cold Butter: Chill the butter before slicing it into the dough—it prevents the yeast from overproofing while shaping. Warm butter melts too fast, and suddenly your bread’s rising faster than you can handle.
- Don’t Overmix the Dough: Stir just until the flour is incorporated; overworking it makes the bread dense. I learned this the hard way after kneading like I was punishing the dough—now I stop when it’s shaggy, not smooth.
- Proof in a Warm Spot: Place the dough near a turned-off oven with a cup of boiling water for steady warmth—no cold kitchen counter. Cold slows the yeast, and you’ll end up with a dense, flat loaf instead of that airy, pull-apart texture.
Pro cooking tips for this recipe
Onion Caramelization Mastery
Start with medium-low heat—this is critical for even cooking. I use a 12-inch cast-iron skillet because it distributes heat perfectly and prevents burning. Cut onions into even halves (no quarters!) so they cook uniformly.
Stir every 5-7 minutes to prevent sticking, and don’t rush—45-60 minutes of slow cooking transforms them into jammy, sweet layers. If the butter browns too quickly, reduce heat immediately to medium-low or even low. 🔥
Dough Hydration Secrets
The dough should feel soft but not sticky—like a well-worn baseball. If it’s too wet, add 1 tbsp flour at a time until it comes together. I find King Arthur flour gives the best texture, but Bob’s Red Mill works too.
The 2 tbsp olive oil in the dough prevents dryness, while the eggs add structure. For extra flavor, replace 1 tbsp water with 1 tbsp milk—it makes the crust slightly richer. 💡
Kneading Like a Pro
Knead for 8-10 minutes until the dough is smooth and elastic. You’ll know it’s ready when it springs back slowly when poked. The caramelized onions should be cool enough to handle before mixing in—warm onions can kill the yeast.
If the dough resists, wet your hands slightly to prevent sticking. After kneading, let it rest for 10 minutes before shaping—this relaxes the gluten for easier rolling. ⚡
Shaping for Even Rise
Divide the dough into 4 equal logs (about 12 inches long). Roll each into a tight spiral to trap the onions inside—this creates those signature pockets of flavor. Place them seam-side down in the pan to prevent cracking.
Brush the tops with olive oil and sprinkle with coarse sea salt right before baking for extra crunch. Let them rise until they nearly touch the pan’s edges—this ensures a tall, airy loaf. 🌟
Baking for Crispy Crust
Preheat the oven to 375°F for at least 30 minutes—this ensures even heat. Bake on the middle rack and rotate the pan halfway through for uniform browning. Brush the tops with olive oil after 15 minutes for that golden, shatteringly crisp crust.
Tap the bottom—it should sound hollow when done. Let it cool for 10 minutes before slicing, or the onions will ooze out. ✨
Troubleshooting Common Issues
If the crust browns too quickly, tent with foil after 15 minutes. For a denser loaf, your yeast might be old—always check the expiration date. If the dough doesn’t rise, your kitchen might be too cold.
Place the bowl on top of the turned-off oven with the light on for warmth. For sticky dough, chill it for 20 minutes before shaping—it firms up beautifully. 💪
Nutrition facts
Frequently asked questions
Can I make this bread without a loaf pan?
Shape the dough into a freeform round or oval loaf and place it on a parchment-lined baking sheet. For extra flavor, brush with olive oil and sprinkle with coarse salt before baking. The texture will be slightly different but still delicious—just expect a denser crust without the pan's rise.
How do I store leftover onion bread?
Wrap the cooled loaf tightly in a clean kitchen towel or beeswax wrap to maintain freshness. Store at room temperature for up to 2 days, or freeze slices for 3 months in an airtight container. To revive frozen bread, warm in a 350°F oven for 5-10 minutes until crispy again.
Can I substitute sweet onions for regular yellow onions?
Yes, but the flavor will differ. Sweet onions like Vidalia or Maui caramelize faster and have a milder taste, while yellow onions develop deeper, savory notes. For best results, use yellow onions—they're more flavorful and hold up better during the long caramelization process.
Why did my bread turn out dense instead of light?
Dense bread usually means the yeast didn't activate properly. Check these common issues: expired yeast, water that was too hot/cold, or not enough kneading. For future attempts, test your yeast first by mixing it with 1 tsp sugar and ¼ cup warm water—it should foam within 5-10 minutes. Also ensure your kitchen is warm enough (ideally 75°F+).
Can I add other ingredients to the dough?
Certainly! Try adding 1 tbsp dried rosemary, 1 tsp garlic powder, or even ½ cup grated Parmesan for extra flavor. For a sweeter version, swap 1 tbsp flour for 1 tbsp honey. Just