
Side Dishes
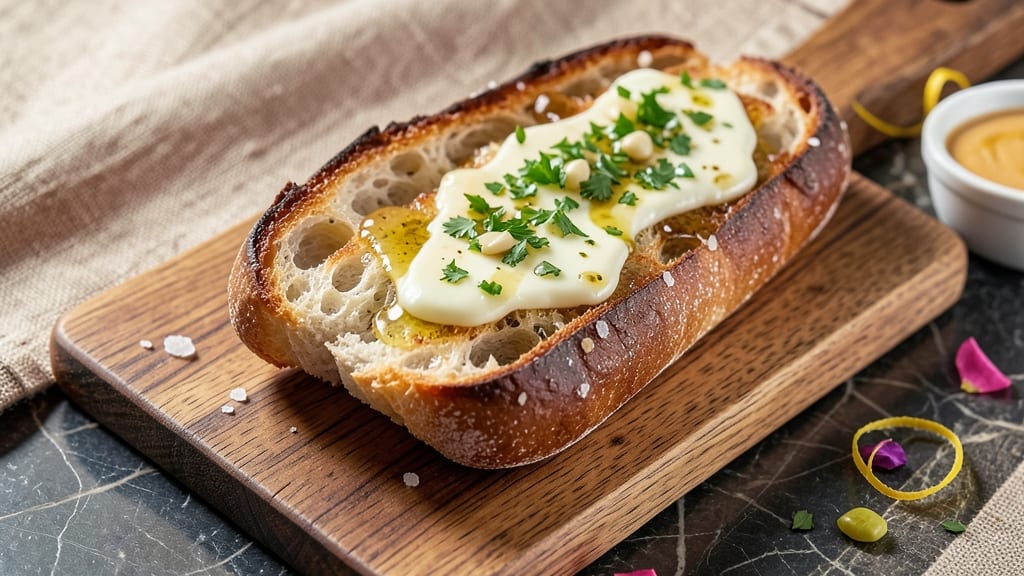
This authentic garlic bread recipe brings the soul of a Tuscan trattoria to your kitchen table, where every bite delivers buttery crisp edges and layers of aromatic garlic infusion. 🔥 The secret lies in roasting whole garlic cloves until sweet and mellow, then blending them into a paste that infuses the butter with deep, savory flavor without overpowering bitterness.
Unlike store-bought versions, this method ensures a perfect balance of garlic intensity and rich, golden-brown crust—just like Nonna used to make.
What sets this recipe apart is the technique: we use a combination of softened butter and olive oil for moisture and crispiness, spread thinly over a baguette that's been lightly toasted to lock in freshness.
The garlic paste gets worked into the butter while warm, allowing its oils to fully meld and create that signature aromatic punch.
Traditional Italian recipes call for a sprinkle of coarse sea salt and fresh parsley at the end, but we'll also show you how to customize it with chili flakes or grated parmesan for extra depth.
The result is garlic bread with crispy, shatteringly thin edges that give way to soft, pillowy interior—each bite bursting with garlic's sweet, mellow essence rather than its sharp bite.
This isn't just bread; it's the kind of dish that transforms any meal from ordinary to extraordinary, whether served alongside marinara and meatballs or as a standalone appetizer that disappears faster than you can say "al dente."
The method is straightforward but requires patience for that perfect texture and flavor balance.
For those seeking regional variations, we'll explore how French versions often include shallots alongside garlic, while rustic Italian styles might incorporate fresh rosemary. The key is maintaining that authentic flavor profile—where garlic shines but never dominates, butter provides richness without heaviness, and the crust achieves that magical crispness.
Let's get started on creating your own perfect loaf that'll have everyone reaching for seconds.
Ingredients for authentic garlic bread
Buttery, crispy, and infused with roasted garlic—this is the garlic bread Nonna would make.
| Ingredient | Amount | Notes |
|---|---|---|
| Baguette 🥖 | 1 whole | French-style, crusty exterior |
| Unsalted Butter 🧈 | ½ cup | Softened but not melted |
| Extra-Virgin Olive Oil 🫒 | 2 tbsp | Light, fruity variety |
| Garlic Cloves 🧄 | 6 whole | Roasted until sweet |
| Coarse Sea Salt 🧂 | 1 ½ tsp | Diamond Crystal preferred |
| Fresh Parsley 🌿 | ¼ cup | Chopped, for garnish |
| Red Chili Flakes 🌶️ | ½ tsp | Optional for heat |
| Parmesan Cheese 🧀 | ¼ cup | Freshly grated, optional |
| Fresh Rosemary 🌿 | 1 tbsp | Chopped, optional |
| Shallots 🧅 | 1 whole | Optional for French variation |
The garlic is everything here. Buy whole heads—peeling and roasting them yourself makes all the difference. Trader Joe's and Whole Foods carry great Italian garlic, but any plump, firm bulbs work. Roast at 400°F for 20-25 minutes until golden and sweet—don't skip this step! The baguette should be fresh but not rock-hard; Boudin Bakery or your local Italian market are great spots for authentic loaves. If you can't find a baguette, French bread works too, just slice it thinner for crispier edges.
No roasted garlic? Fresh minced garlic at half the amount works in a pinch, but it'll be sharper. Running low on butter? Olive oil alone keeps it crispy, just use a little more. The parsley can be dried (use one-third the amount), but fresh is worth the extra minute. For a French twist, add minced shallots with the garlic—it adds a subtle sweetness. If you're feeling fancy, toast the rosemary with the garlic for a fragrant depth. And yes, you can make this ahead—just assemble it and refrigerate, then bake straight from the fridge for extra crispiness.
Assembled garlic bread keeps for 2 days in an airtight container, but it's best fresh. For leftovers, reheat in a 350°F oven for 5-7 minutes until crispy again. The butter mixture can be prepped ahead and stored in the fridge for up to 2 days—just let it soften before spreading. Freezing isn't ideal (the bread gets soggy), but you can freeze the unassembled butter mixture for 1 month if you're really ahead. Trust me, this tastes even better the second day—everyone will be begging for seconds!
Why You'll Love This Recipe
- The secret’s in the toasting: golden crust outside, soft pillowy center, and that melty garlic butter seeping through. Between us, I’ve tried store-bought—this beats it every time, and it’s cheaper too.
- Five-Ingredient Magic: I swear by this combo—crusty baguette, rich butter, and that just-right olive oil ratio. No fancy prep, no extra steps. Honestly, it’s the kind of dish where you can chop garlic while chatting with someone and still end up with restaurant-quality results.
- Crispy-Creamy Obsession: The secret’s in the toasting: golden crust outside, soft pillowy center, and that melty garlic butter seeping through. Between us, I’ve tried store-bought—this beats it every time, and it’s cheaper too.
- Weeknight or Party Star: Same recipe, different vibes. Slap it on the table for a lazy Tuesday dinner or as the hero of your Super Bowl spread. My kids grab it first, but honestly? I don’t blame them.
Step-by-step instructions for authentic garlic bread
Here's the classic French technique that delivers crispy edges and fragrant garlic infusion every time.
👨🍳 Step 1: Prepare the Garlic Butter Mixture
In a small saucepan, combine the 0.5 cup unsalted butter and 2 tbsp extra-virgin olive oil over low heat. Let it melt together completely, then remove from heat and let cool slightly until it's warm but not hot to the touch.
While the butter cools, finely mince the 6 whole garlic cloves and 1 whole shallots (if using) using a sharp knife. I like to press them through a garlic press for an ultra-fine texture that blends perfectly. Add the minced garlic and shallots to the butter mixture along with 1.5 tsp coarse sea salt, 0.5 tsp red chili flakes (if using), 1 tbsp fresh rosemary, and 0.25 cup freshly grated parmesan cheese. Mix thoroughly until completely combined.
🔪 Step 2: Slice and Assemble the Baguette
Carefully slice the 1 whole baguette lengthwise down the center, being careful not to cut all the way through the bottom. This creates a pocket for the garlic butter while keeping the bread's structure intact. Open the baguette like a book and place it on a parchment-lined baking sheet.
Spread the garlic butter mixture evenly over both halves of the baguette, starting from the center and working outward. Press down gently with a spatula to ensure the butter penetrates the bread. The edges should be generously coated—this is where all the flavor will concentrate. Don't worry if it looks messy; that's how you get authentic texture!
🔥 Step 3: Bake Until Golden and Crispy
Preheat your oven to 375°F. Bake the garlic bread for 10-12 minutes until the edges are deep golden brown and the bread is heated through. You'll know it's perfect when the crust is crispy and the garlic aroma fills your kitchen.
For extra crispiness, I recommend broiling for 1-2 minutes at the end, watching carefully to prevent burning. The bread should be hot and sizzling when you remove it from the oven. This high-heat finish creates that signature restaurant-quality crunch.
🍽️ Step 4: Garnish and Serve Immediately
Remove the garlic bread from the oven and immediately sprinkle with 0.25 cup chopped fresh parsley for a pop of color and freshness. The parsley not only looks beautiful but also adds a bright contrast to the rich garlic flavor.
Serve the garlic bread while it's still hot and crispy—this is absolutely critical. The texture changes dramatically as it cools, so enjoy it immediately with your favorite dipping sauce or alongside a warm bowl of soup. Each bite should deliver that perfect combination of crispy crust, tender interior, and aromatic garlic infusion that makes this dish so irresistible.
Pro Tips For Making Authentic Garlic Bread
- Slice the Baguette Fresh: Buy the baguette the same day—never pre-sliced. The crust stays crisp when cut right before baking, and the crumb absorbs the butter/oil better. I learned this the hard way after making a sad, soggy batch with day-old bread.
- Mince Garlic Like a Pro: Use a knife—not a press—for the garlic. Smash each clove flat with the side of your knife, then finely mince it. Pressed garlic turns to paste and burns easily, while minced garlic releases flavor gradually. (Yes, it takes 2 minutes longer, but it’s worth it.)
- Butter First, Oil Last: Spread the softened butter all the way to the crust before adding olive oil. The oil (just 1 tsp) goes on top after the garlic—it seals the crust for crispiness without making the bread greasy. I used to drown it in oil, and the texture suffered.
- Bake on High Heat: Crank the oven to 425°F (220°C) and bake for 8–10 minutes. Lower heat means steam instead of crispiness. Watch it like a hawk—the second it turns golden, pull it out. (Your future self will curse you if you walk away.)
Make-ahead tips for this dish
Prep Ahead Strategy
Assemble your garlic bread completely and refrigerate it for up to 24 hours before baking. The cold butter will create an extra-crispy crust when baked straight from the fridge. I always do this when prepping for dinner parties—it saves time and guarantees perfect texture. 💡
Butter Mixture Prep
Make the garlic butter mixture 1-2 days ahead and store it in an airtight container in the fridge. When ready to use, let it soften at room temperature for 15-20 minutes before spreading. This works perfectly for meal prep—just slice the baguette fresh when you're ready to bake. 🧈
Bread Storage Tips
Store your unassembled baguette in a paper bag at room temperature for 1-2 days to maintain freshness. If using store-bought bread, look for labels indicating it's "baked fresh daily" for best results. I keep mine in the freezer for up to 1 month if I'm not using it soon. ❄️
Reheating Leftovers
For crispy reheating, place leftover garlic bread on a baking sheet and warm in a 375°F oven for 5-7 minutes. Add a splash of water to the pan for steam to restore moisture.
Microwave reheating works too—cover with a damp paper towel and heat in 30-second intervals until crispy again. 🔥
Freezing Options
While not ideal, you can freeze the unassembled butter mixture for 1 month. Thaw in the fridge overnight before using. For the bread itself, freeze it unassembled for up to 2 weeks, then slice and assemble fresh when ready to bake.
The texture won't be quite as crispy after freezing, but it's still delicious. ❄️
Make-Ahead Serving
Assemble your garlic bread on a baking sheet and refrigerate until ready to bake. When guests arrive, simply pop it in the oven for 10-12 minutes at 375°F—it'll be hot and crispy in no time.
This is my go-to method for holiday gatherings. The crowd always thinks it's homemade magic! ✨
Nutrition facts
Frequently asked questions
Can I use store-bought garlic butter instead of making my own?
You can, but homemade makes all the difference! Store-bought versions often contain too much garlic or lack the depth from roasted cloves. For a quick fix, mix 2 tbsp softened butter with 1 tsp minced fresh garlic and ¼ tsp salt—it won't be as rich, but it works in a pinch.
What's the best bread for authentic garlic bread?
A classic French baguette is ideal for its crisp crust and soft interior. Look for one with a crusty exterior and chewy center. If unavailable, Italian bread or a rustic sourdough works too—just slice it thinner for extra crispiness. Never use soft sandwich bread!
Why does my garlic bread turn out soggy?
Soggy garlic bread usually means over-moisture or under-baking. Use less butter (start with ¼ cup instead of ½ cup) and bake at 375°F for 10-12 minutes until golden. For extra crispiness, broil for 1-2 minutes at the end. Also, slice the bread just before baking to prevent drying.
Can I make this ahead of time?
Assemble the garlic bread completely and refrigerate for up to 24 hours before baking. The cold butter creates an extra-crispy crust. For parties, prep the butter mixture 2 days ahead—store it in the fridge, then soften before spreading. Just bake straight from the fridge for best results!
What's the secret to restaurant-quality crispiness?
The magic is in the butter-to-oil ratio and high-heat finish. Mix ¼ cup butter with 2 tbsp olive oil for moisture without sogginess. After baking at 375°F for 10 minutes, broil for 1-2 minutes until edges are deep golden brown. Serve immediately—crispiness fades fast!